
Labor Day Liftoff: Compressed Views
This blog assumes a morning liftoff. Current Labor Day Liftoff events/schedule can be found here.
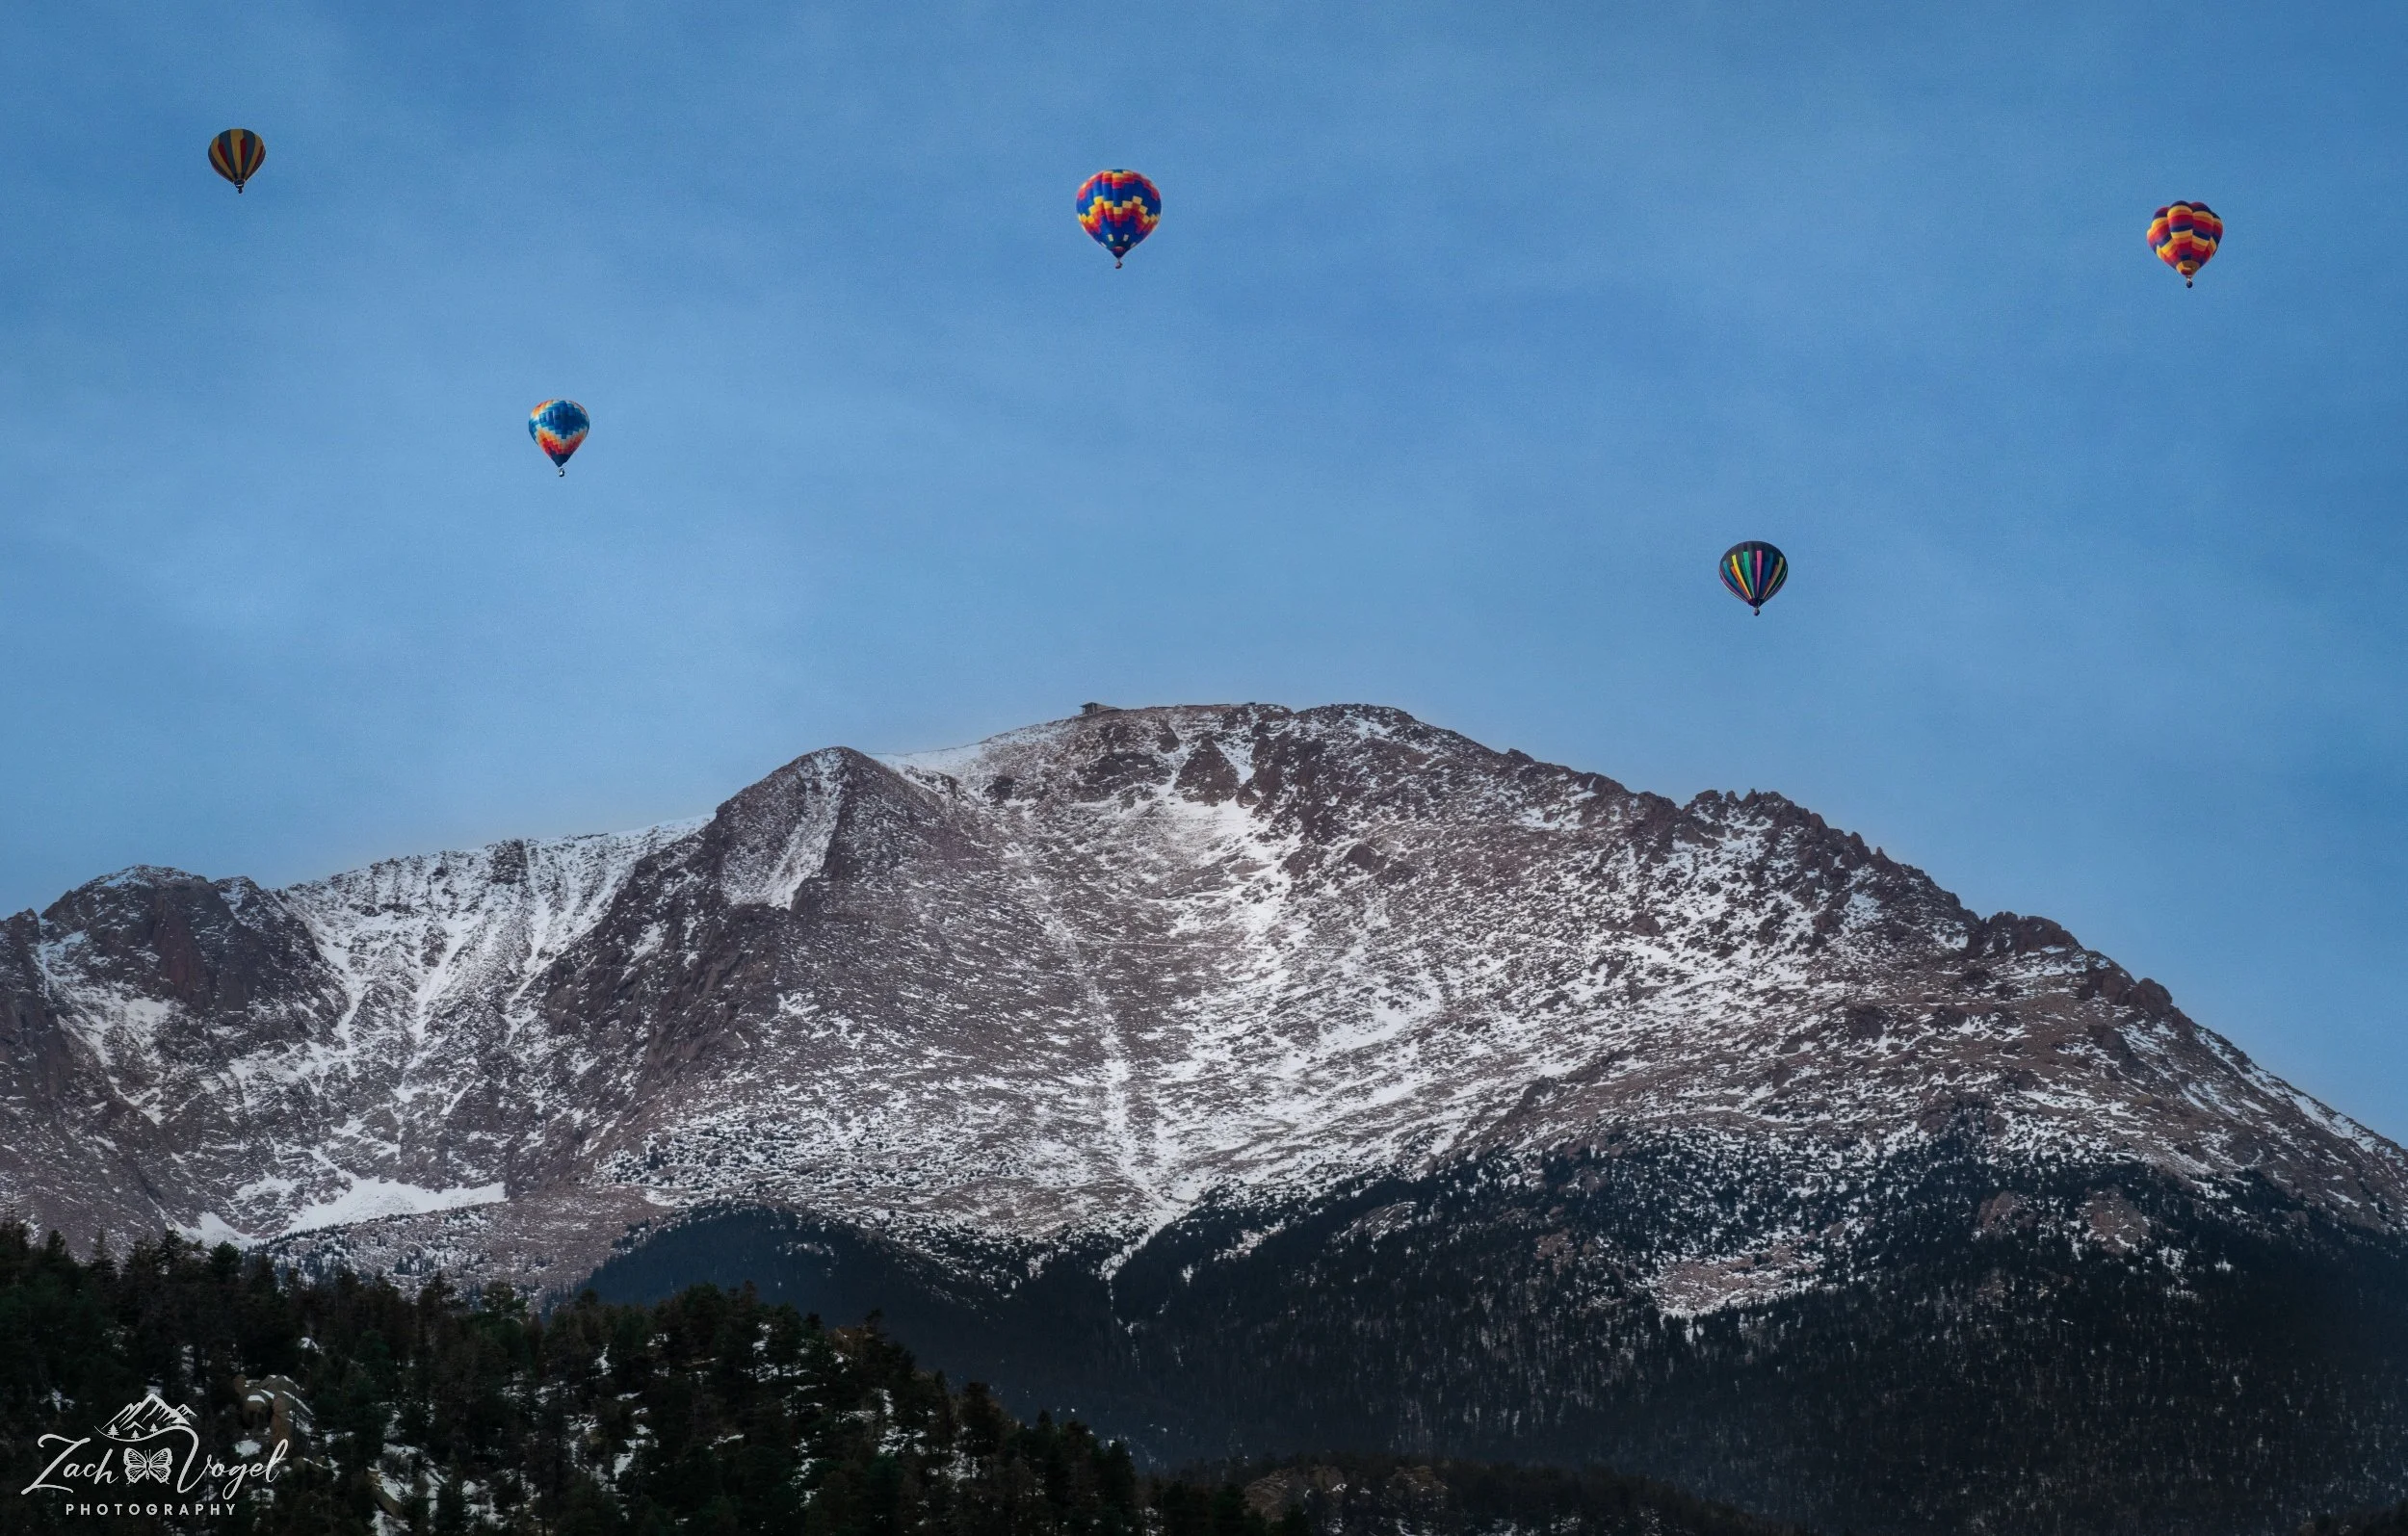
Everyone and their mother is going to have wide shots of the balloons during the Labor Day Liftoff. I say this because we all pretty much walk around with an 11mm wide-angle lens in our pocket, integrated into our cellphones.
Force a bit of creativity and think tighter. With a 150–600mm lens, maybe a 70-200mm lens, you’ll be hunting compression: stacking balloons against Pikes Peak, isolating details, and grabbing atmospheric layers. You won’t want to be down in the middle of Memorial Park (that’s better for wides). Instead, you need elevated distance and clear sightlines west toward Pikes Peak, or east toward the sunrise, with enough separation to fill the frame.
Here’s a map-style rundown of four different facing vantage points around Colorado Springs that line up beautifully for telephoto work:
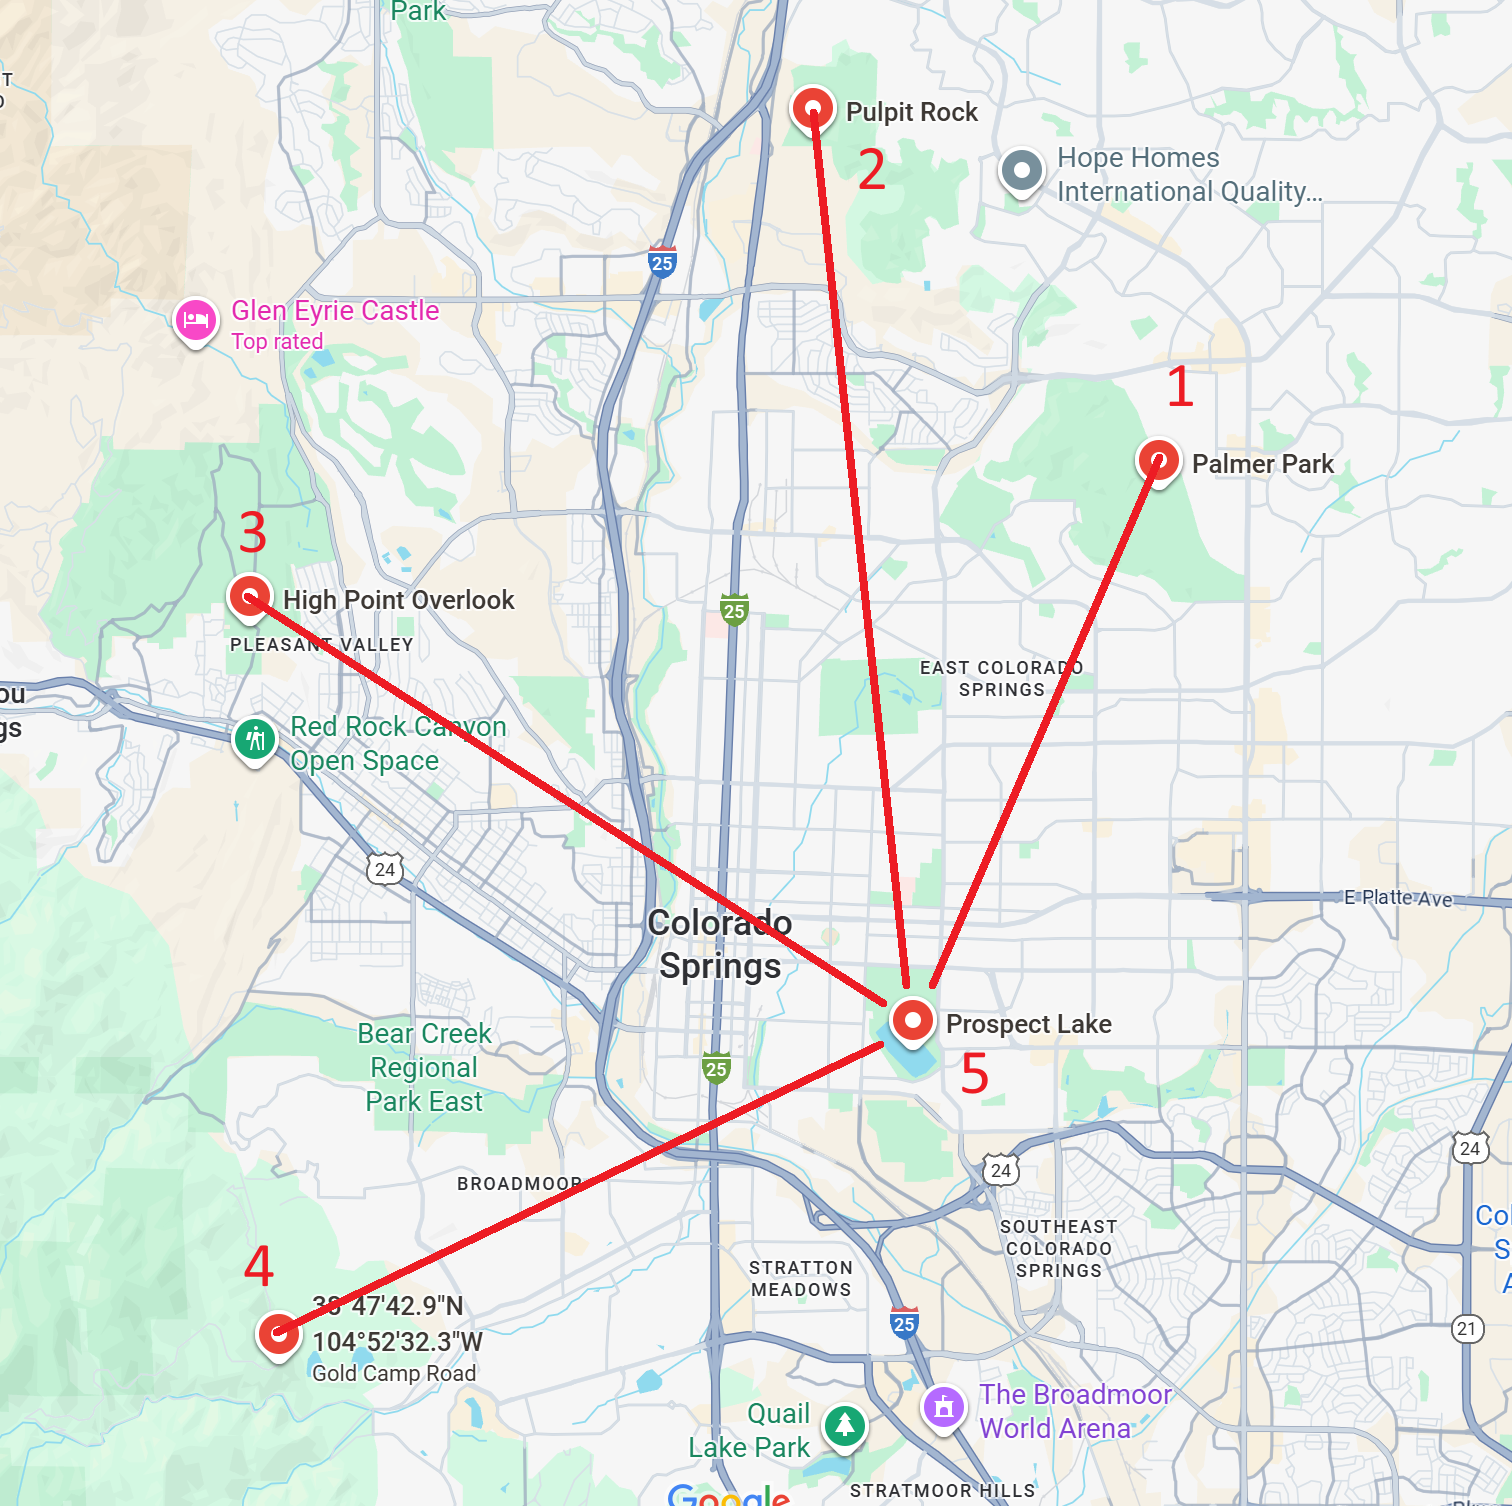
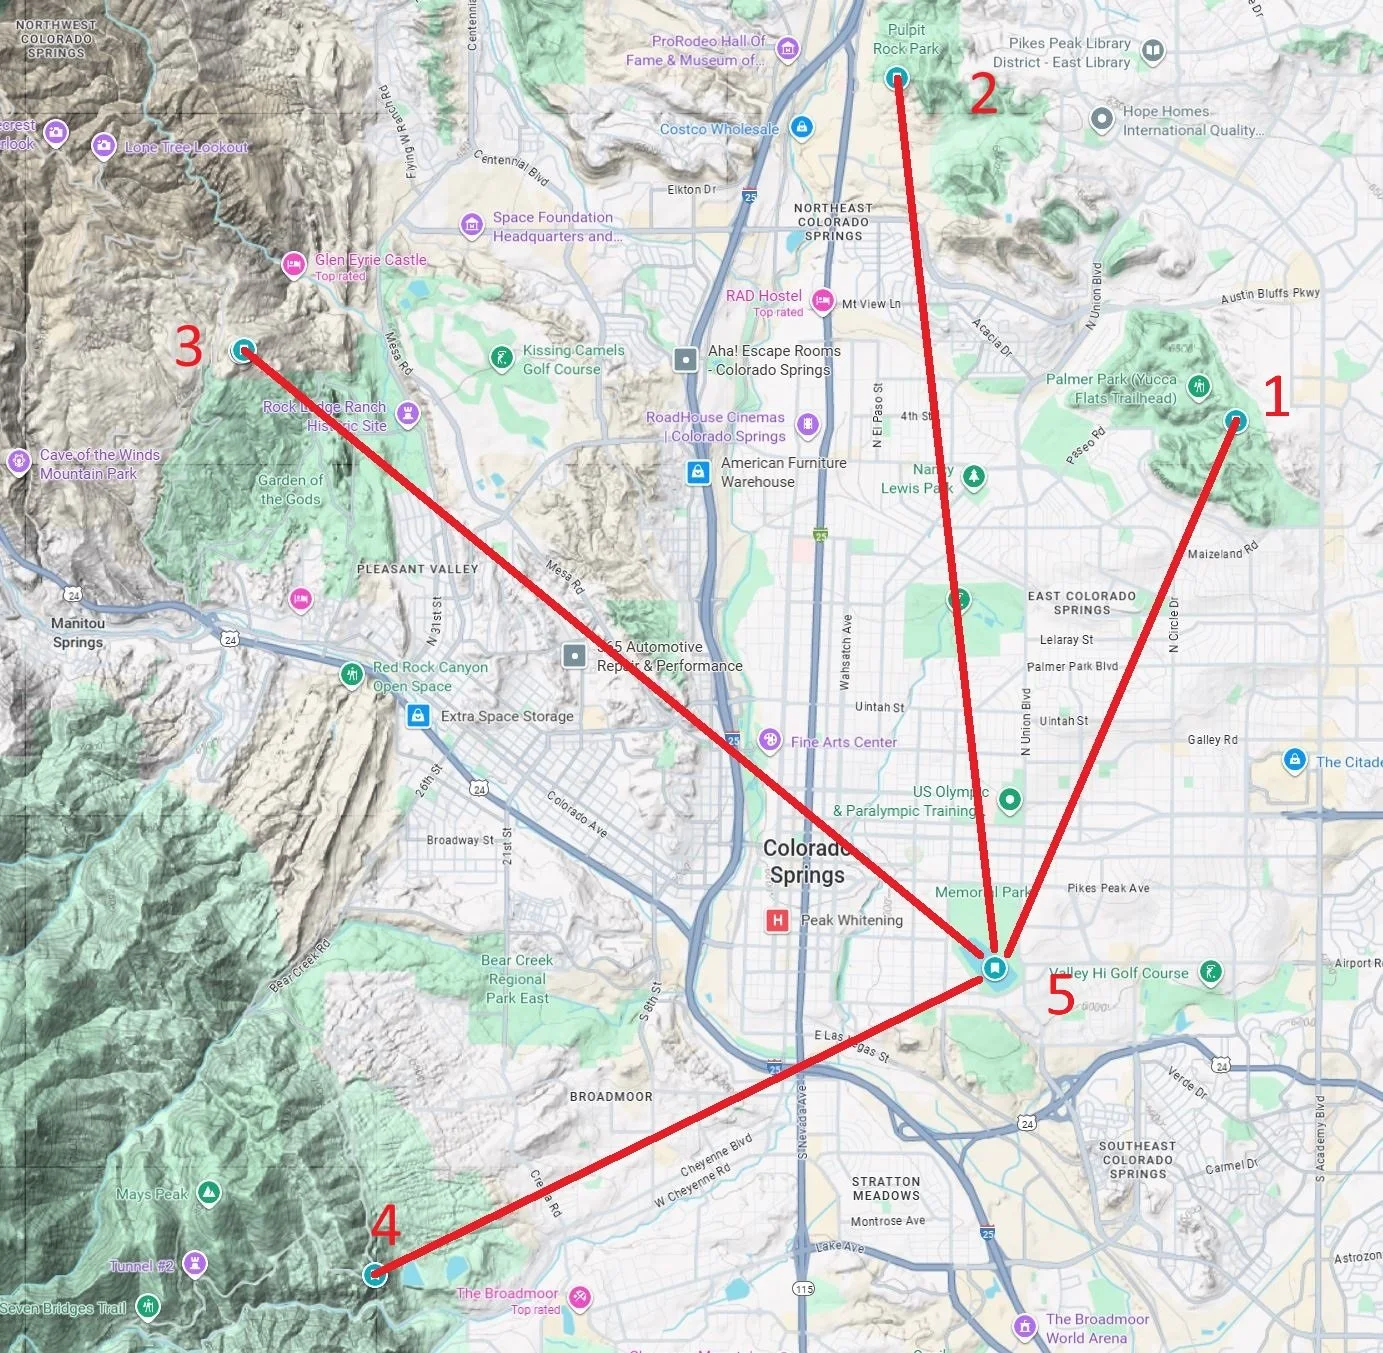
Useable Map Link: Labor Day Long Lens Shooting Locations
🔭 Telephoto Vantage Points for Labor Day Lift Off (150–600mm)
1. Palmer Park – Sunset Rocks / Grandview Overlook
Distance: ~3 miles NE of Memorial Park.
Why it works: Classic overlook facing south-southwest. From here, you can compress balloons rising above the city with the peaks as a backdrop. The ~200–400mm range frames Pikes Peak/Cheyenne Mountain behind multiple balloons, while 500–600mm isolates clusters.
Bonus: Layer balloons against the mountains early in the liftoff for the best light.
2. Austin Bluffs Ridge (near UCCS & Pulpit Rock)
Distance: ~5 miles N of Memorial Park.
Why it works: High ridges with an unobstructed south-facing view. From here, you can catch balloons spread wide across the city.
Lens sweet spot: 400–600mm to isolate balloons against Pikes Peak / Cheyenne Mountain.
3. Mesa Road Overlook (Garden of the Gods gateway)
Distance: ~6 miles W of Memorial Park.
Why it works: Elevated ridgeline with views east across the city. If balloons drift eastward, you can frame them above the skyline with the Colorado Plains stretching in the distance.
Lens sweet spot: 200–400mm for city-wide context, 600mm for single-balloon + skyline juxtapositions.
4. North Cheyenne Cañon / Gold Camp Road pullouts
Distance: 5–7 miles SW of Memorial Park.
Why it works: Elevated roads with long east-facing sightlines. You’ll be looking slightly downward toward the park.
Lens sweet spot: 300–500mm compresses balloons drifting south/east with the Colorado Plains behind.
5. Prospect Lake (for compression across water)
Distance: Ground zero.
Why it works with tele: Even at close range, a 150–600 lets you compress reflections + multiple balloons across the lake surface. Shooting from the east/southeast shore back toward the city and mountains gives depth.
Looking North: lens sweet spot: 150–300mm Looking West: have a 70-200 handy
Note: For a more landscape feel, try a 70-200mm from any of the above locations.
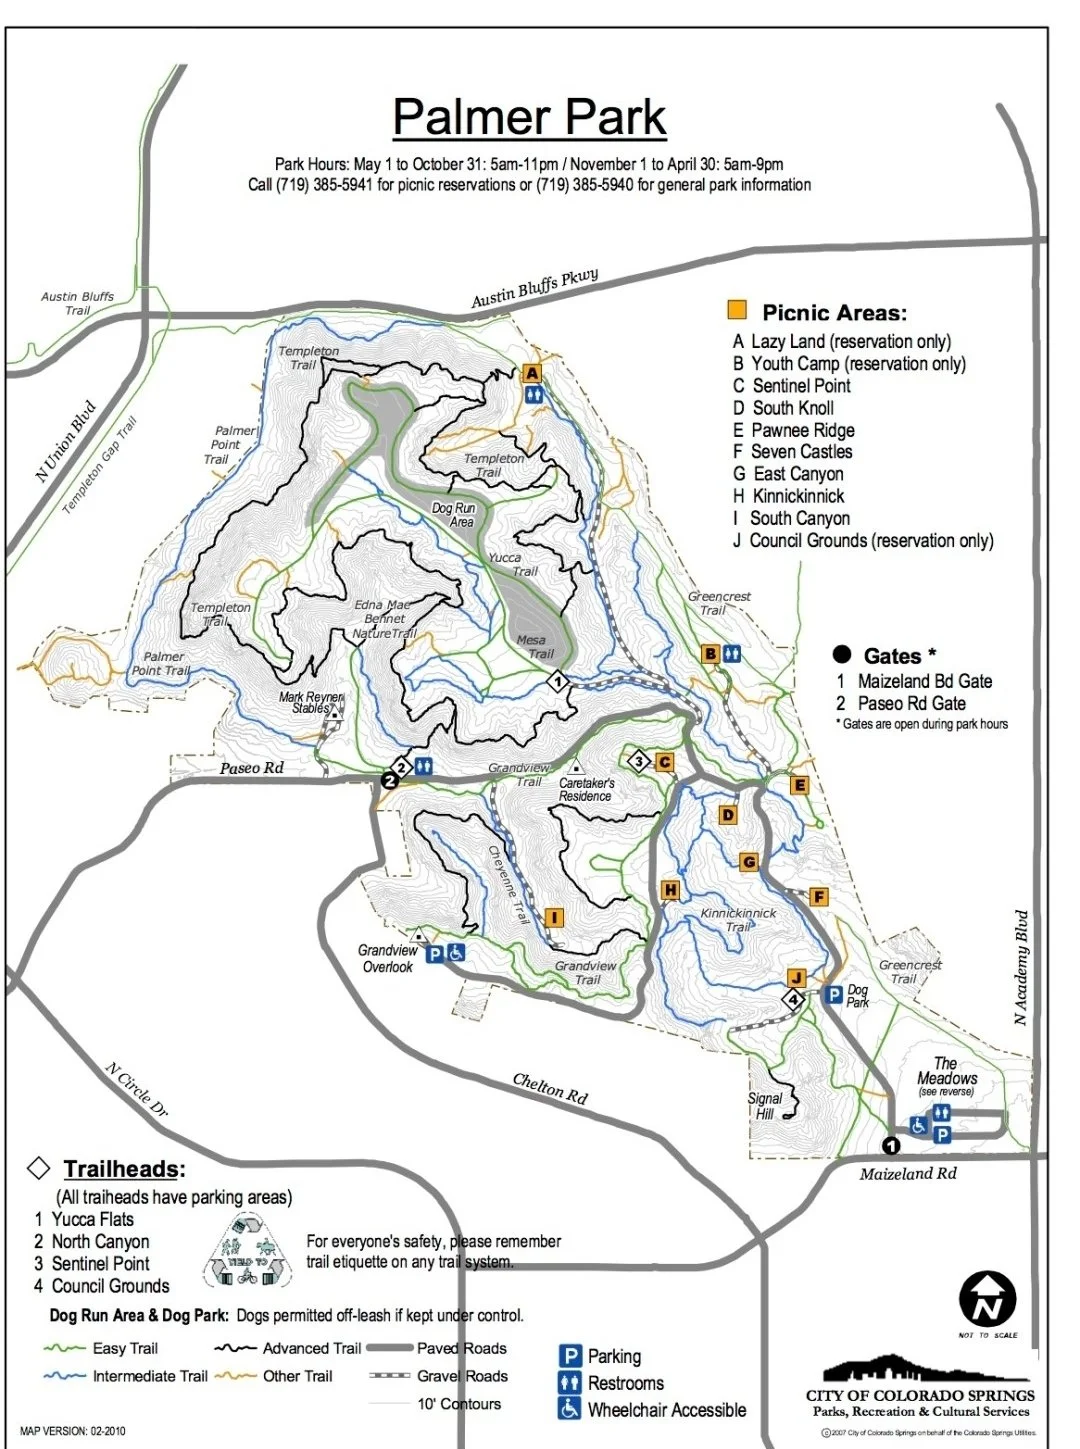
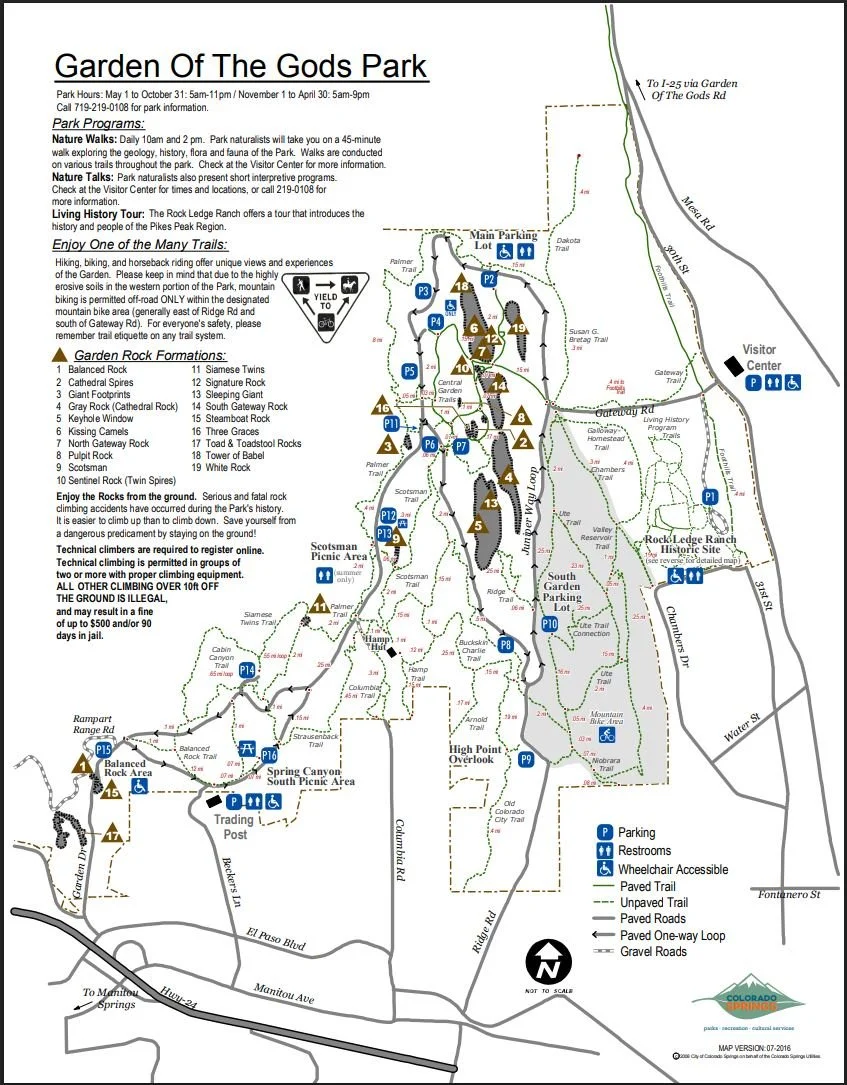
Map Download Links: Palmer Park Map | Garden Of The Gods Map
📷 Shooting Strategy With 150–600mm
Pre-dawn (blue hour): Use the long end (500–600mm) for burner details, crew silhouettes, and early lift against twilight gradients.
Launch (7–8 a.m.): Switch between 200–400mm for layering clusters of balloons against Pikes Peak and 500–600mm to isolate single-balloon against pops of color in the sky.
Drift phase: Track balloons as they scatter — be mobile, or set up on ridges downwind.
Evening glow: Keep the lens closer to 150–200mm if you’re at the lake, otherwise you’ll crop too tight. Consider a 70-200mm as well.
Vantage Points & Guided Services
Check my availability
Key Tips for Using the Maps
1. Palmer Park: Focus on higher elevations and gaps facing west. Great for early morning light hitting balloons and the peaks.
2. Austin Bluffs region: advanced scouting is highly recommended. Seek ridgelines for views.
3. High Point Overlook: No hiking necessary here. Balloon views looking East/Southeast.
4. Gold Camp Road & North Cheyenne: Look for wide canyon views. Pull-outs along the road let you create sweeping lateral frames.
Final Thoughts & Next Steps
Scout routes in advance. Use these maps in conjunction with Google Maps or a mobile GPS to estimate hike times and elevation.
Plan your lens use. These spots favor 400–600 mm for stacking and isolating details. Keep 70-200 mm handy for context.
Plan for mobility. If you want to shift between vantage points quickly, time your travel between locations (e.g., from Palmer Park to Prospect Lake).
Gear prep: Pack a tripod, trail-worthy shoes, and consider hiking poles if you’ll be accessing steep overlooks. Don’t forget the headlamp, jacket, water, and spare battery/memory card.
Don’t forget about those reflections in Prospect Lake (5.)


Prospect Lakeside Images | 70-200mm at ~90mm
